Hand carved vintage style Indian club
I decided to make a short, heavy Indian club with a broom handle instead of a knob.
I normally use a 4.7 kg meel to do single arm exercises. The meel is too long, and has the wrong swinging properties for some of these exercises. My IB3 club has the right length and swinging properties, but is too light.
I normally use a 4.7 kg meel to do single arm exercises. The meel is too long, and has the wrong swinging properties for some of these exercises. My IB3 club has the right length and swinging properties, but is too light.
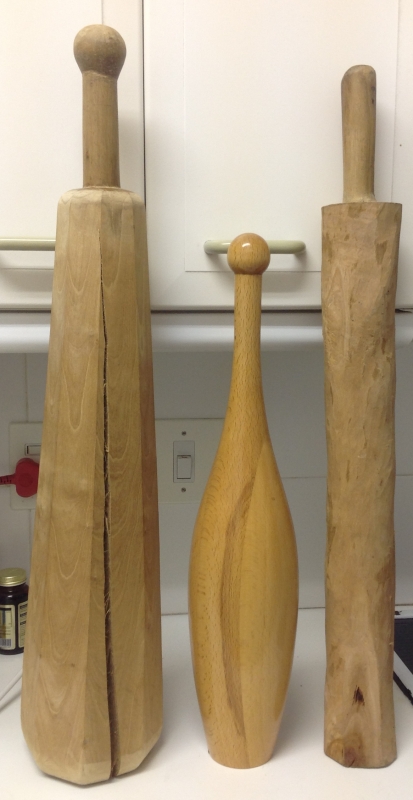
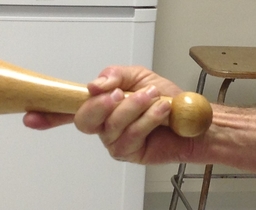
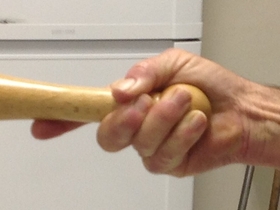
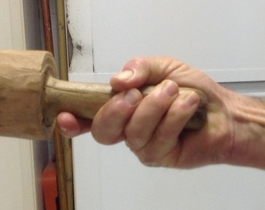
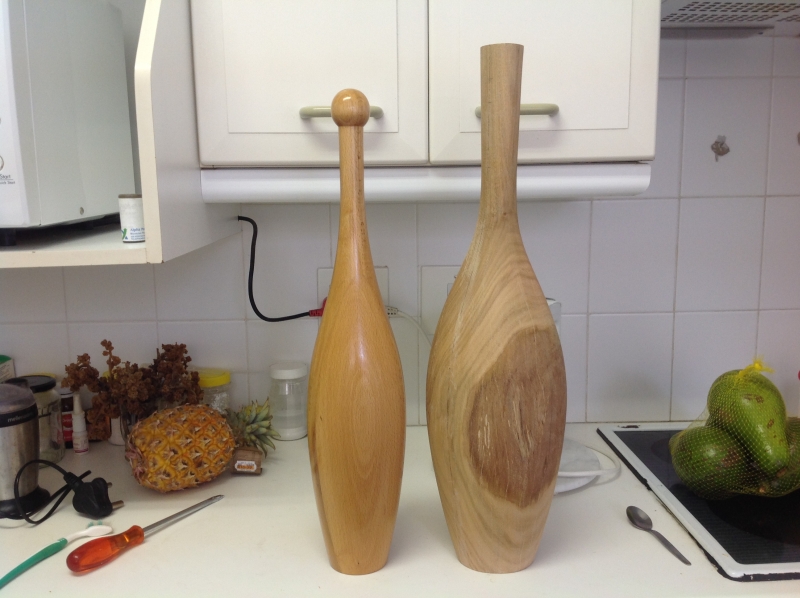
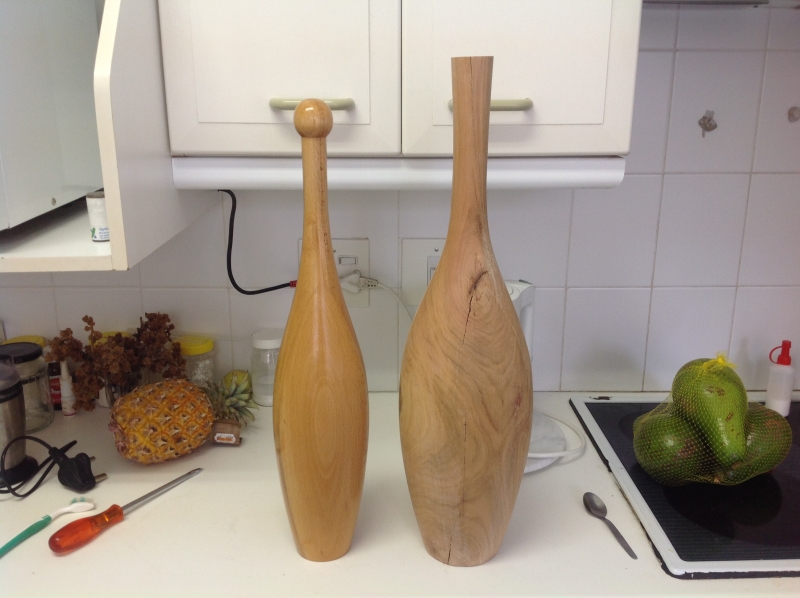
Both of these clubs have a knob at the end of the handle. When I use a sabre grip, I have two options. I can hold the handle below the knob. Then the knob pushes uncomfortably against the tendons on my wrist. I can also hold the knob in my hand, but the knob is too big to hold comfortably in my hand. The broom handle club on the right is very comfortable to use, because there is no knob to push against the wrist, and it fits perfectly into my hand.
|
|
|
So I decided to make a single broom handled club based on the IB3 length and proportions, but about 5 kg in weight.
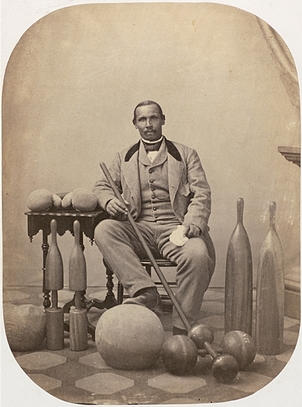
Broom handled clubs are not very popular, but they have been around for some time. You can see some broom handled clubs in the daguerreotype below, dating from 1860. The man in the picture is Aaron Molyneaux Hewlett. He was the director of the Harvard College Gymnasium from 1859 to 1871.
**************************************
All of the clubs I have made to date were based on either cylindrical or conic sections. It was relatively easy to calculate the expected weight using high school maths. This approach does not work on clubs having a complex shape. So I created an Excel spreadsheet that uses a crude form of finite element analysis to do this for me.
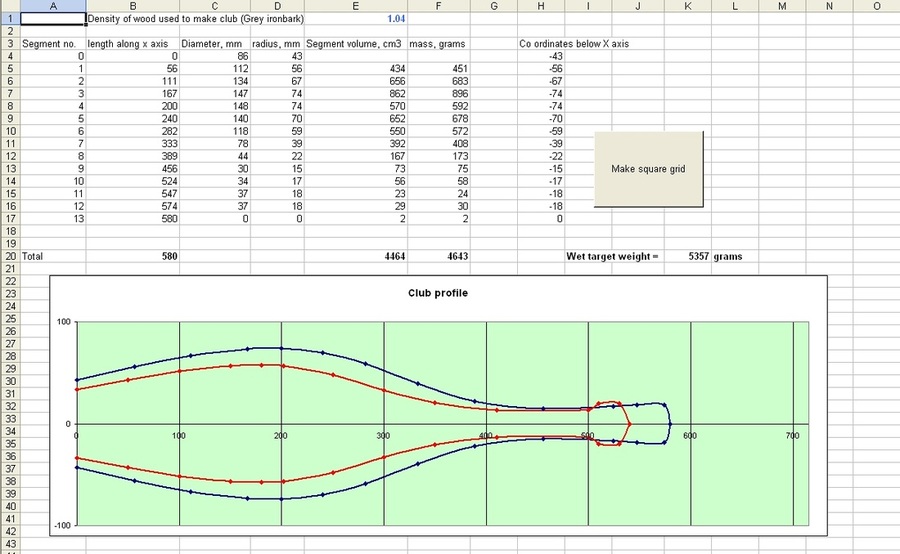
The club outlined in blue is my new proposed club. The red outline is the IB3 club on which it is based. The spreadsheet calculates a weight of 4.64 kg, based on a density of 1.04. All of the clubs I have made have been slightly heavier than I expected. I think this is because I am cautious when I carve my clubs, and leave a generous margin for any errors. So if the same pattern is followed, the club should weigh over 5 kg.
Measuring density of the wood used to make the club is extremely important. I cut a small test block, and measure the length, width and height with a vernier gauge. I use this to calculate the volume. I weigh the block on a jeweler’s scale, accurate to 10 mg. I calculate the density from the relationship density = mass/volume.
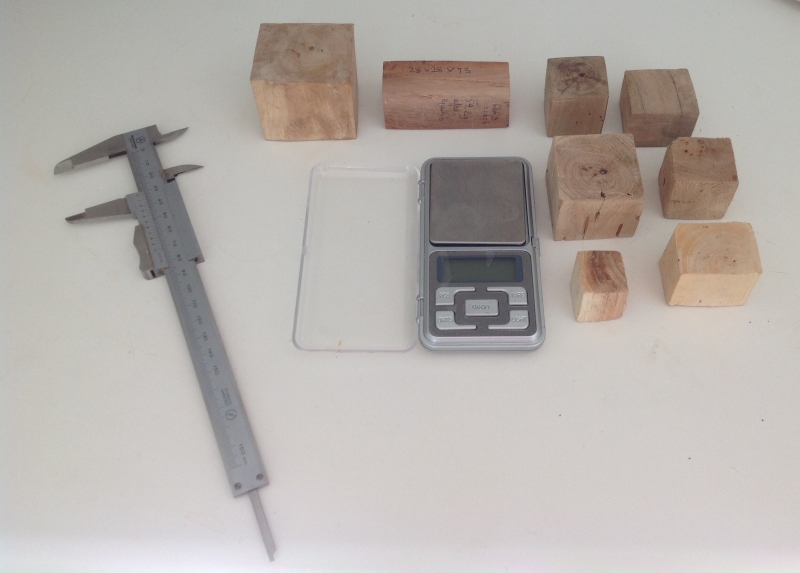
If the wood is wet, I dry the test block in the microwave oven. I use short bursts of microwave energy, maybe 15 seconds at a time, with a wait of 45 seconds between. If I zapped my block continuously, the steam pressure would cause it to pop, like pop corn! After microwaving, I have to wait a few days before weighing, to allow equilibration of moisture.
**************************************
My vintage style club is made out of the same branch that I used to make my long handled club. The section that I used had been lying on the ground for four months. The end that was cut 4 months ago was cracked badly. The end that I cut started cracking a few hours after cutting. The cracks appeared to radiate from the core of the section.
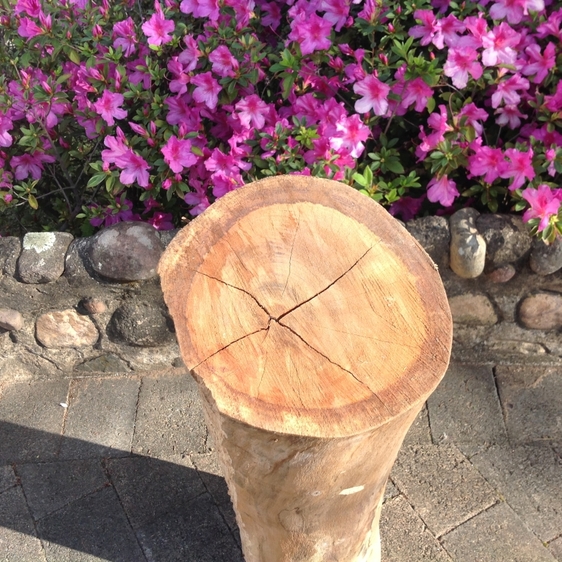
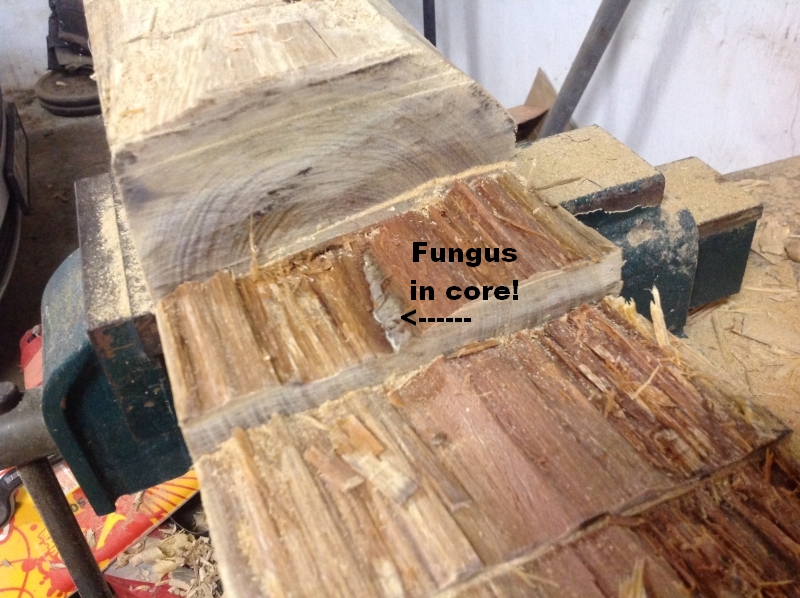
I think the core is weak, due to some disease. (That is why the branch fell in the first place). So when I cut my club, I have to keep the core away from the handle area.
When I stripped the bark, I could see where fungus had already started attacking the sapwood.
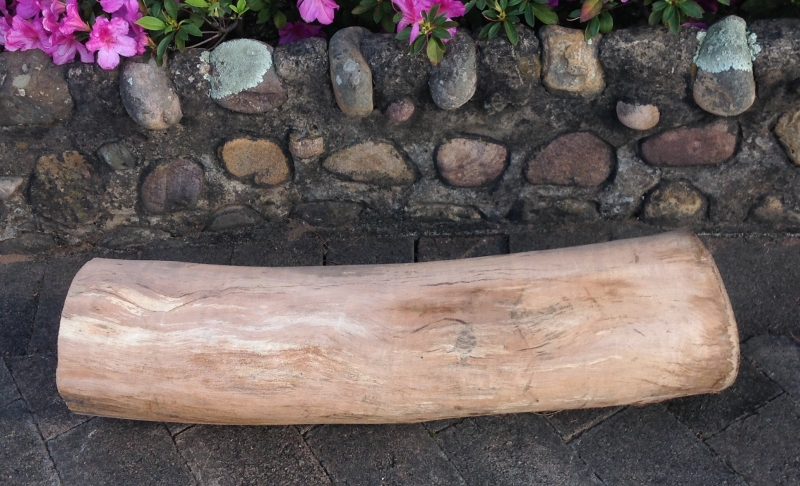
The section was 84 cm in length, and had an average diameter of 21 cm. After debarking, it weighed 34.4 kg.
**********************************
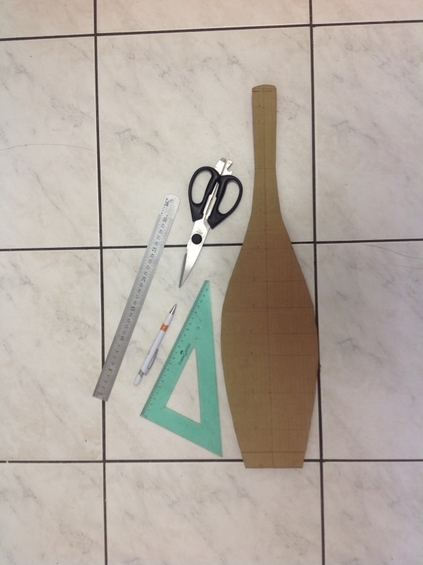
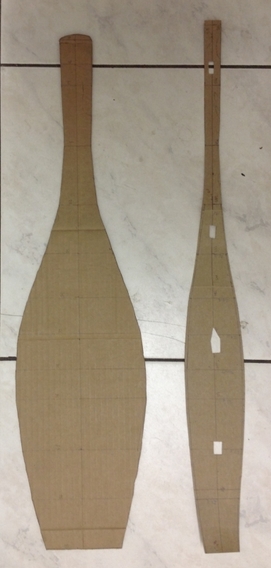
First step was to draw the outline onto a piece of cardboard. This would become my template.
Next was to cut flat surfaces and square the ends of my billet of wood. As usual, I used a chisel, plane and bow saw.
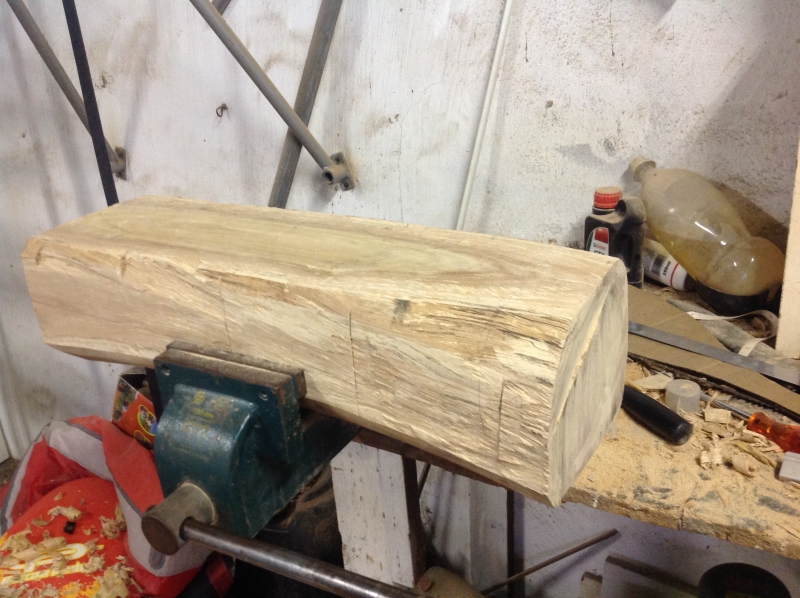
I drew the club outline using the template. I deliberately offset the club, because I wanted to avoid the core running through the handle. This was a good decision. I discovered later that the core was weakened by some kind of fungus.
I drew centerlines on all the flat surfaces, including the ends. It is vitally important to have the centerlines cross on the ends, because this will be the only reference you have when you start cutting wood to make your club.
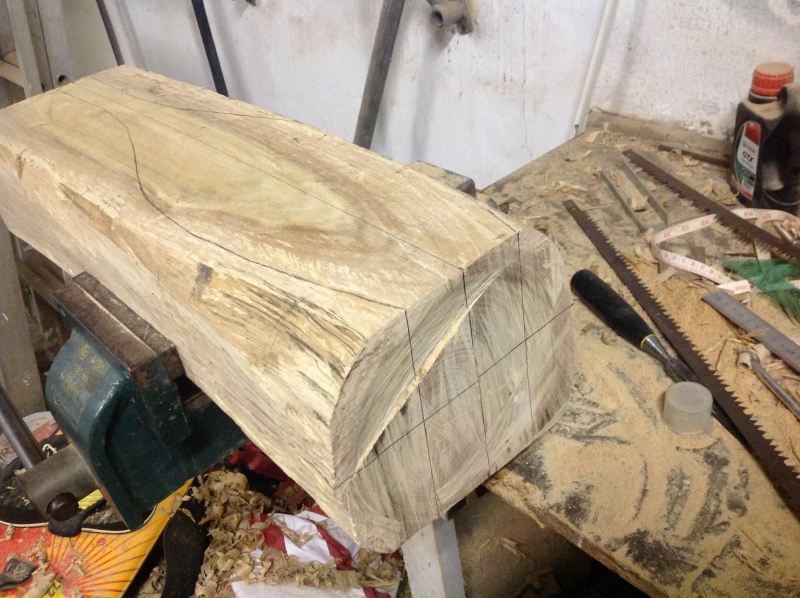
After drawing the club outline using the template, I cut into the wood using my bow saw.
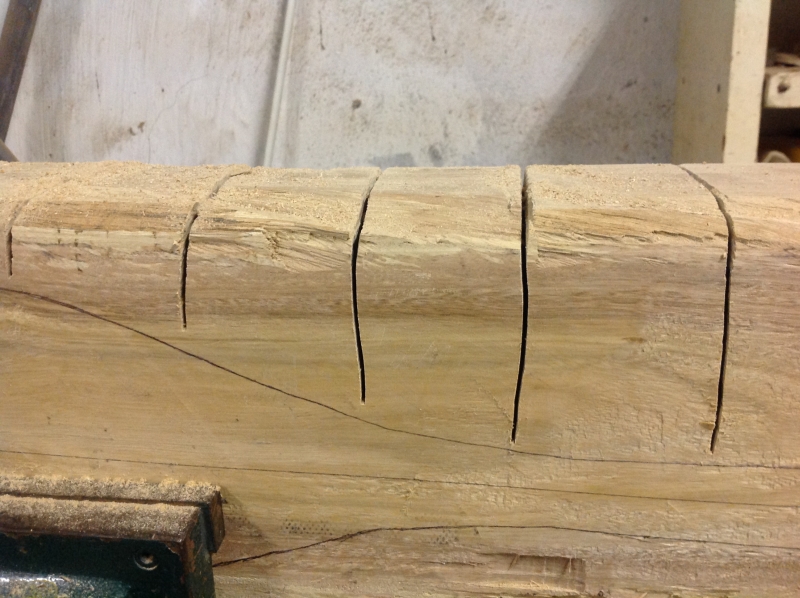
I used a chisel to remove the wood between the saw cuts

After cutting into the core, I found a white fluffy material that looked like some kind of fungus. This explains why the tree was sick, and shed branches!
This is what the club looks like after removing excess wood from two sides. Weight was 12.8 kg
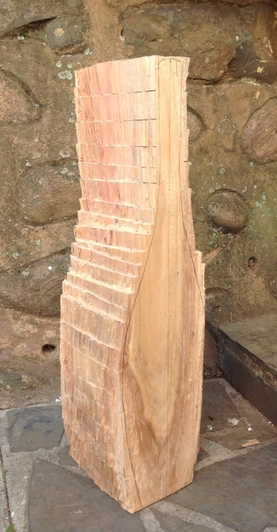
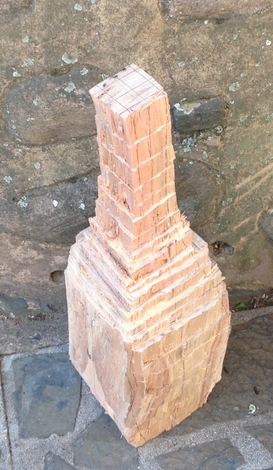
I removed excess wood from the other two sides. The club now has a square cross section. It looks like a stepped Burmese temple! Weight was 10.5 kg
|


|
I planed the sides to remove the steps. Weight was 8.5 kg.
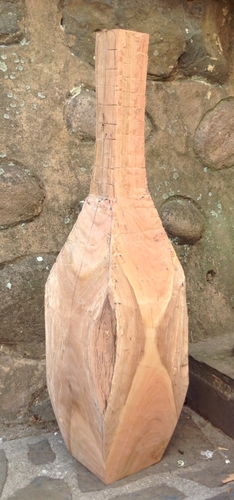
I calculated the ratio of the chord to diameter of a symmetrical octagon that circumscribed a circle. It was 0.41. I used this ratio to draw another template to give me a symmetrical octagonal outline to the club. I cut portholes along the centreline of this template, so that I could position it on the centrelines that were already on the club. I removed excess wood. The octagonal club now weighs 6.8 kg.
|
|
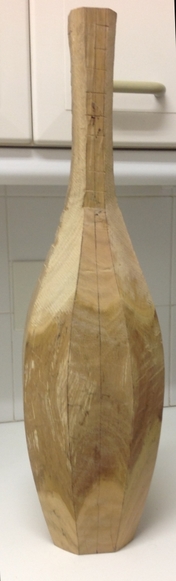
I did some work with a rasp and a file to obtain a circular cross section. The club weighs 6.4 kg. Here is a picture of it standing next to the IB3 club. The wood grain looks like banded agate! The dramatic pattern is the result of offsetting the handle.
Here is a picture of the other side. You can see how the weakened core has become the epicenter for cracks. Fortunately, these cracks are easy to deal with.
I shaped the handle. I filed the body of the club to improve the symmetry about the longitudinal axis. The club now weighs exactly 6.0 kg. But I expect the weight to drop by a few hundred grams over the next 6 months. In the mean time, I will use it.
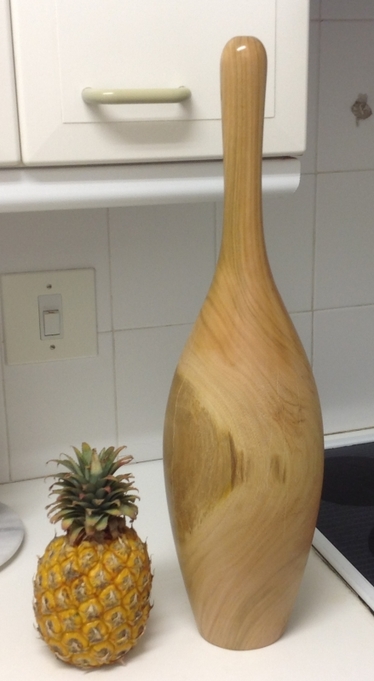
Still life with pineapple
|
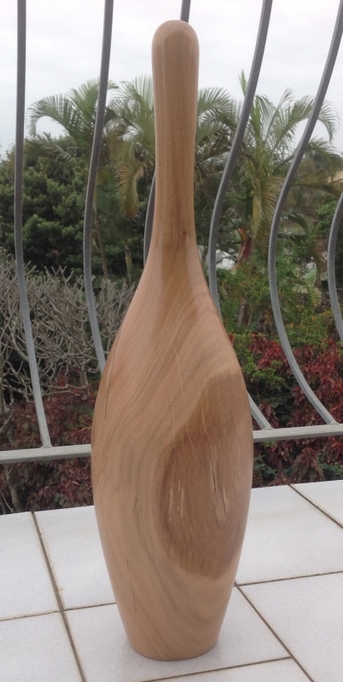
Big Bertha
|
